
Before You Copy Your LMS Course
Instead of manually installing new integrated assignment links each time you teach, you can save time by copying assignments from an LMS course you integrated in a previous term, or from a template course prepared for you by an LMS administrator.
Before you begin copying your course, check to make sure that you are copying from an LMS course with a fully functional Davis Advantage integration. To test the integration in this “source course," click on any Advantage assignment link in the source LMS course to confirm that it still successfully loads a Davis Advantage assignment.

Then, click the “CLASSES” button above the assignment to view your Advantage Classes page and verify that the original course is still listed in Davis Advantage.
The source course's integrated Advantage class will have the same name as the source course in your Learning Management System, and may appear under either the “ACTIVE” or “EXPIRED” class list depending on how long ago the course concluded.
Please note that you can only copy course integrations using the same edition of the same textbook. If your school may have changed textbook editions recently, you can confirm which edition the previous course was using by opening any integrated Advantage assignment and clicking the “eBook” link.
To reiterate, if your intended source course was using a different textbook and/or edition than what you intend to use for your LMS course, do not copy Advantage assignment links from that LMS course.

Copying/Importing Advantage Assignments Into a New LMS Course Shell
To copy your integrated Advantage assignments into a new course shell, you can follow the same steps you would normally take to copy assignments from one LMS course to another.
If this is your first time importing content into a new course, select your LMS from the list below and follow the step-by-step instructions provided by its hyperlinked page:
Launch a Davis Advantage Assignment to Create an Integrated Advantage Class
Click an Advantage assignment link in your new LMS course. Depending on your LMS, the Advantage assignment may load automatically in a new browser window, or you may be taken to a launch page with a button to load the assignment.
If you are taken to an Advantage assignment launch page, you may see an assignment description entered by an admin or the source LMS course's creator. If you don't see an assignment description, you can add one later on the assignment's setting page in your LMS.
Click the button that reads "Load (assignment name) in a new window," so your Advantage assignment will launch in a new tab.

If you click an Advantage assignment link and it fails to launch, it's possible your web browser settings blocked the assignment's launch page. Check your browser settings to make sure pop-ups are permitted.
After launching an Advantage assignment, you'll see a student preview of an Advantage assignment.

If Davis Advantage loads successfully upon launching an Advantage assignment, that means you have successfully activated and launched your new integrated Advantage course. The Advantage assignment links in your copied LMS course will not link to the source LMS course's Advantage class.
Your students will now be able to use the links in your LMS to automatically enroll in this new Davis Advantage course and access their assigned coursework, which will be recorded in your new LMS course's gradebook.
Please stress to your students that they must always access Advantage assignments via the links in your new LMS course, for their grades to record correctly.
Finalize Your New Advantage Class' Settings
Most of your original LMS course's Advantage Class settings will carry over as part of the LMS course copy. The only settings you will need to edit each time are the assignment due dates, which can be found under the “Schedule Content” tab of your Advantage Class Setup.
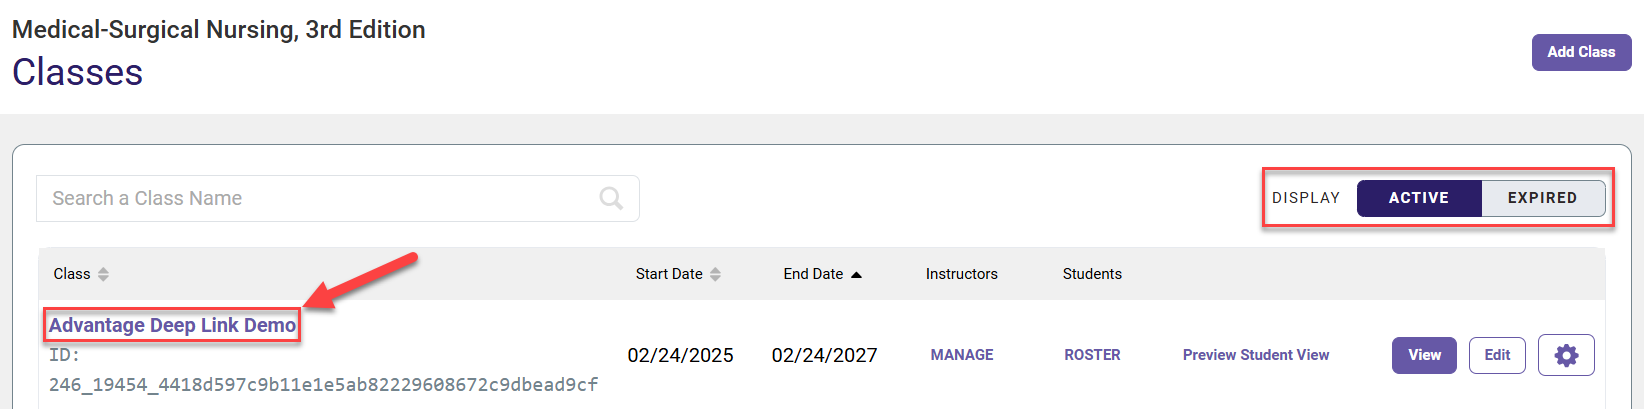
To navigate to your Advantage Class Setup, first launch an Advantage assignment, then navigate to your Advantage Classes page by clicking "Classes" in the top-left navigation bar.
Your Advantage Classes page collects your current and expired Advantage classes. After a successful launch, an Advantage class with the same name as your LMS course will appear under your list of Active Classes.
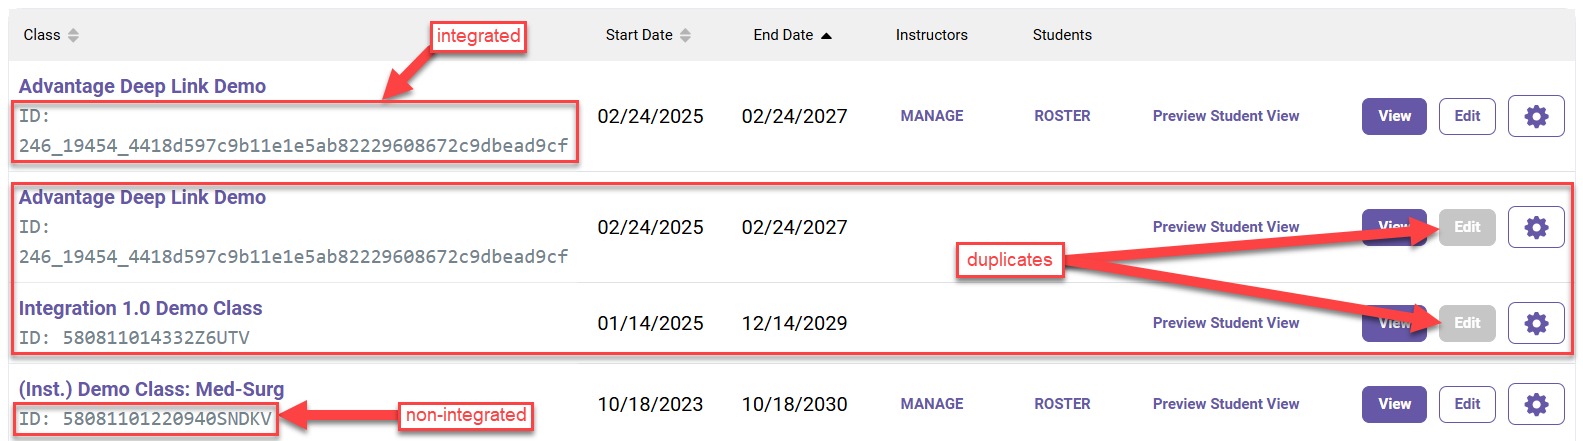
You may see a duplicate listing directly below that course, but you can disregard this as a normal part of the integration display; duplicate listings will have "Edit" buttons that can't be clicked. If you do see a duplicate course, please only make changes to the course listed in BOLD font.
Do not delete any (active or expired) integrated Advantage courses or their duplicates. If you're uncertain whether an Advantage class is integrated or not, look at its Class ID; integrated Advantage classes have longer Class IDs than non-integrated Advantage classes.
For more information on your Advantage Classes page features, please consult the "Navigate to your Davis Advantage Class Setup" section of our Instructor "Quick-start Guide" article.
Click the "Edit" button for your class to access your Advantage Class Setup.

Details on Davis Advantage Class Setup navigation can be found in the video guide at the top of this page, and in the "Finalize your Advantage Class Setup" section of our Instructor "Quick-start Guide" article.

